IMPORTANT: This tutorial is for an old version of Slider Revolution (version 4.0). If you recently purchased the Symbiostcok Express theme, you will have a new version of Slider Revolution bundled with your theme. New users please see the Replicating Demo Homepage Quick Guide which includes a sample slider that you can import into your site. Additionally, the Slider Revolution Video Tutorial provides a more in depth learning experience if you want to spend more time developing skills for creating unique sliders.
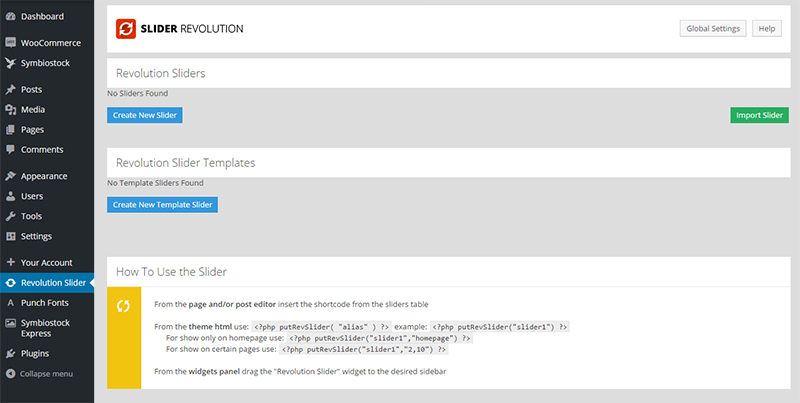
Before we begin, make sure you have activated the Revolution Slider plugin. To do this, go to the Plugins tab in your admin panel. Locate the Revolution Slider plugin and click ‘Activate‘.
The Revolution Slider provides a plethora of ways for you to create custom slides, however with so many setting options available, it can seen overwhelming. This guide is a good place to begin learning how to customize the Revolution Slider. You will learn how to create the slider that is on the Symbiostock Express demo site. Once you have gone through these steps, you should be able to experiment more readily with the Revolution Slider and create your own personalized slides.
SETTING UP A NEW SLIDER
1. Go to the Revolution Slider tab in your admin panel.
2. Click ‘Create New Slider‘. This will open up a ‘New Slider’ screen.
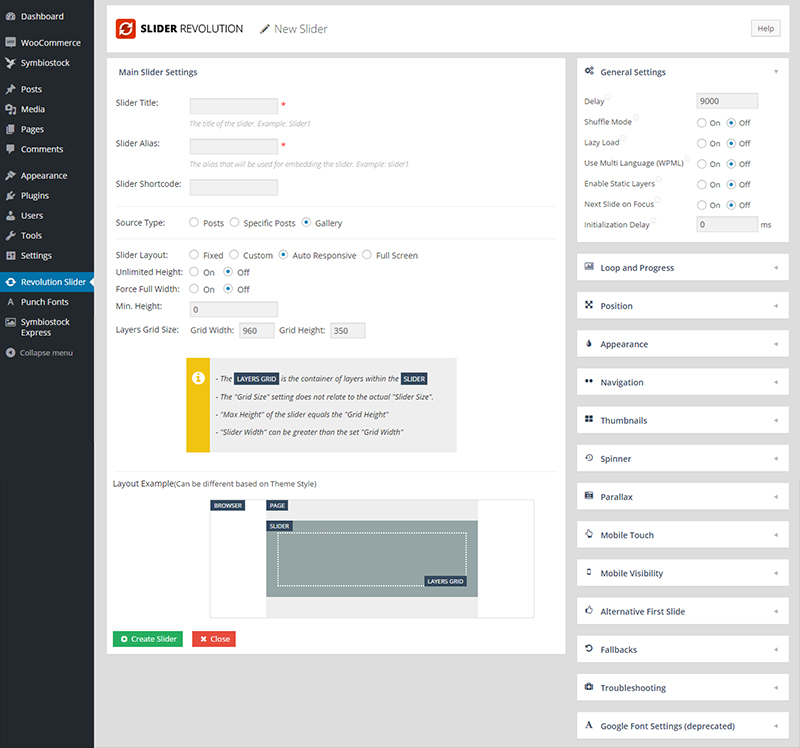
3. In the ‘Main Slider Settings‘ section change the following:
Slider Title: Homepage Slider
Slider Alias: Homepage Slider
Source Type: Gallery
Slider Layout: Auto Responsive
Unlimited Height: Off
Force Full Width: On
Min Height: 0
Grid Width: 1170
Grid Height: 500
4. In the ‘General Settings’ section (in the right column) change the following settings:
Delay: 4000
5. In the ‘Appearance’ section change the following settings:
Shadow Type: No Shadow
Background Color: #ffffff
6. In the ‘Navigation’ section change the following settings:
Bullet Type: None
7. In the ‘Mobile Visibility’ section change the following settings:
Hide All Layers Under Width: 770
8. Click ‘Create Slider‘.
PREPARING IMAGES FOR SLIDES
Before we proceed to adding slides, you need need to prepare the images that you will use.
The Symbiostock Express demo site uses six images (one for each slide) for its homepage slider. Choose 6 images that you want to use to represent your store. Remember, this will be the first thing most visitors will see when they visit your homepage – so try to choose images that highlight and provide a glimpse into the types of images you offer.
Each of your chosen images must be cropped/resized to 2000px wide by 500px high.
Save your images as JPEGS and try to reduce the file size of each image (the smaller the file size the quicker your page will load). You may also want to add a small non-obtrusive watermark/copyright to each image (eg. a copyright symbol with your name/store name in the corner of each image).
ADDING SLIDES
Now that you’ve have set up a new slider and your images are ready, we need to add slides to your slider.
1. In your Revolution Slider screen you should see the name of the slider you created earlier (ie Homepage Slider). You should also see various ‘Actions‘ that you can select in the same row as the slider. Click the ‘Edit Slides‘ action.
2. In the Edit Slides screen it should say ‘No Slides Found’, as we have not yet added any slides.
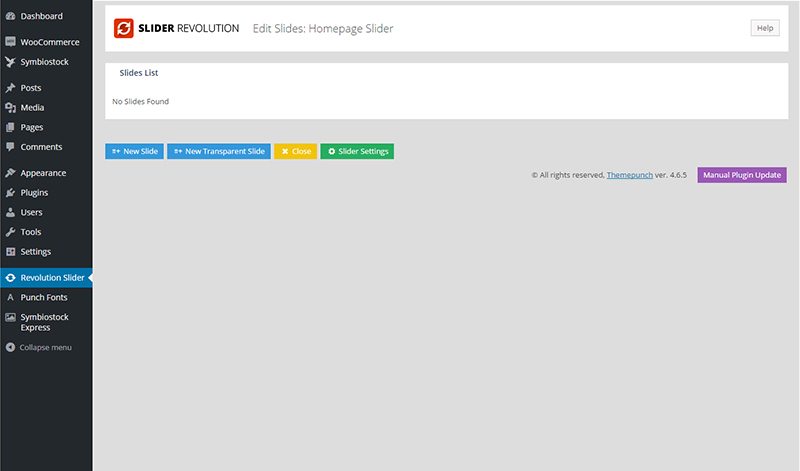
Click ‘New Slide‘. You will be prompted to select an image for your slide. Upload one of your prepared images. Click ‘Insert‘. Your first slide has been created.
Repeat this step for each of your remaining images.
3. You should now have 6 slides listed on your screen. Before we proceed to editing each slide, you need to decide on the order that you want your images to appear. Your slides are numbered 1 to 6 – 1 being the first image that will appear to 6 being the last. To rearrange the slides, use the gray button located on the left side of each slide to drag and drop each slide into your desired sequence. You will notice that your slides are automatically re-numbered according to their position. Once you are happy with the order, proceed to the next step.
4. Click ‘Edit Slide‘ for Slide 1.
5. In the ‘General Slide Settings‘ section, follow these settings:
State: Published
Transitions: Fade
Slot Amount: 7
Transition Duration: 300
Save Performance: Off
Enable Link: Disable
6. In the ‘Slider Main Image / Background‘ section, follow these settings:
Background Source: Image BG
Background Fit: Cover
Background Repeat: no-repeat
Background Position: center top
Ken Burns / Pan Zoom Settings: Off
7. In the ‘Slide‘ section, follow these settings:
Helper Grid: 50 x 50
Snap to: None
8. Now to add some dynamic text over your image. In this step you will need to make decisions about:
– the words that will appear over your image
– the styling of the text (font/font size/font color)
– the position of words (where they will appear over your image)If you do not want to add text to your slide you can skip to step 13.
You can preview your slide at anytime by clicking the magnifying icon.
9. Click ‘Add Layer‘. A new layer will appear in the ‘Layers Timing & Sorting‘ section. Select the new layer by clicking on it. When selected the layer will be highlighted in blue.
In the Start column, enter 1500. In the End column, enter 4000.
10. The ‘Layer General Parameters‘ section is where you edit and stylize your text. Delete the default text (Caption Text1) that was created and type the words that you want to use in the rectangle input field. Style the words by selecting a pre-defined font style from the ‘Style‘ dropdown menu, or click ‘Edit Style‘ to create custom styles.
11. The ‘Align, Position & Styling‘ section is used to position the text. The nine square grid can be used to place your text at pre-programmed locations such as center/center top/bottom left etc. Experiment with the ‘Align, Position & Styling’ parameters to position your text. As you make adjustments, you can see how the text will appear on your image preview in the ‘Slide’ box. Alternatively, you can click on the text layer that is shown on the image preview and position the text by dragging it where you want. Just make sure to remain within the blue grid area.
12. The ‘Layer Animation‘ section is where you program the way your text will be animated. There are many settings and options in this section. We are going to choose a very subtle animation that looks calm and professional.
Within the Layer Animation box, follow these settings:
Start Animation: Fade
Start Easing: Linear.easeNone
Start Duration: 600 ms
Split Text per: No Split
Split Duration: 10 ms
End Animation: Choose Automatic
End Easing: No Change
End Duration: 300 ms
Split Text per: No Split
Split Duration: 10 ms
Animation: Disabled
13. Click ‘Update Slide‘ to save your work. Your slide is now complete.
14. Click ‘To Slide List‘ to return to your list of slides. Click ‘Edit Slide’ for the next slide on your list and repeat steps 5-13 for your remaining slides.
15. After editing each of the individual slides your slider is ready to be used. To preview your slider, go back to the Revolution Slider tab in your admin panel. In the Actions column for your new slider, click the magnifying icon. A preview pop-up screen will appear to show you a small scaled preview of your newly created slider.