- Login to your WordPress dashboard.
- Go to Appearance > Menus
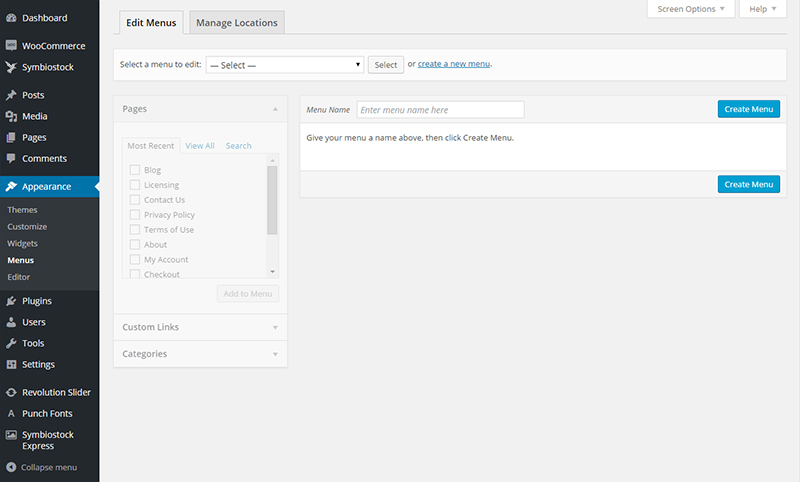
- Click ‘create new menu‘
- In the ‘Menu Name‘ field enter a name for your new menu. It is best to choose a name correlates to the location of where the menu will be. So, as this menu will be in your Primary Navigation section, name it ‘Primary Menu’.
- Click ‘Create Menu‘
- Before we proceed to adding links to your Primary Menu, we need to assign where you would like your menu to be displayed. Under ‘Manage Settings‘ there is a list of navigation locations. Select ‘Primary Navigation‘ and ‘Mobile Navigation‘. **Note if Mobile Navigation is not selected your menu will not appear on mobile devices.
- Click ‘Save Changes‘
- Now we will add links to your Primary Menu. Make sure you are still in the ‘Edit Menus‘ tab.
- If your Primary Menu is the only menu you have, it will automatically be selected. If you have other menus, select ‘Primary Menu’ from the ‘Select a menu to edit’ dropdown. Click ‘Select’ to select the menu.
- Using the ‘Pages’ and ‘Custom Links’ option boxes, add the links that you want to your menu. You can drag and drop items within the ‘Menu Structure’ section to order them according to your preference. You can also add sub-items to your menu. To make the items sub-items drag them slightly to the right under the page you would like. You can make sub-items for sub-items by dragging even further to the right as shown below under the Shop page.
- Once you have added/configured your links, click ‘Save Menu‘.